Calendar & timeline views
- Equipe Produit

- Sep 13, 2024
- 4 min read
Updated: Apr 3
Discover now our calendar view, allowing you to display your data over time and plan your upcoming needs.
Calendar View
Timeline View
Calendar view
Configure your form
For data to be displayed in this view, the form must be configured. It needs to have a start date and an end date (date/time type). This operation is performed in the parameters tab of your form, under the 'Data Representation' section.

Access to the calendar view
To access this calendar view, simply open the side menu, which already allows you to access the mixed, mosaic, or map view. You will find the new option 'Calendar View.'
This new calendar view allows you to display your records on a calendar. There are 4 different display modes that you can select on the top toolbar:

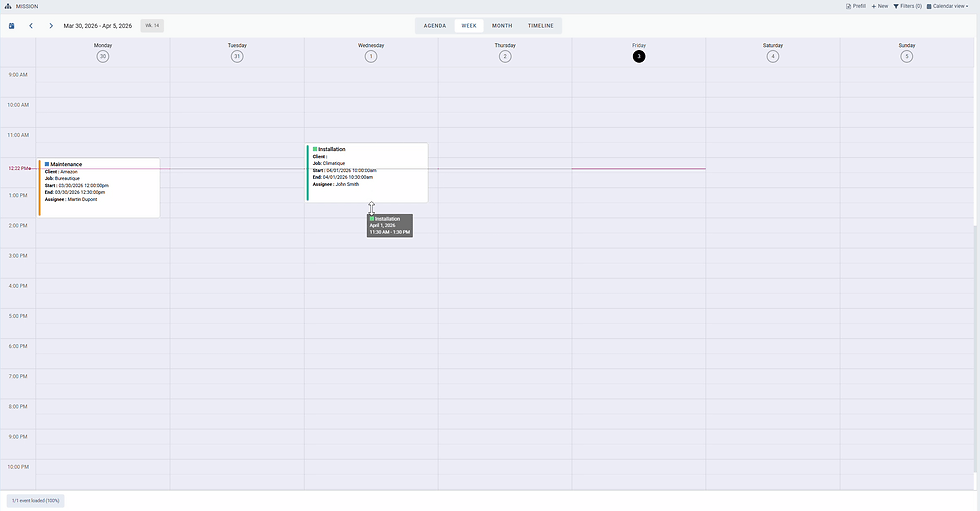
Agenda, which shows the content of the selected day
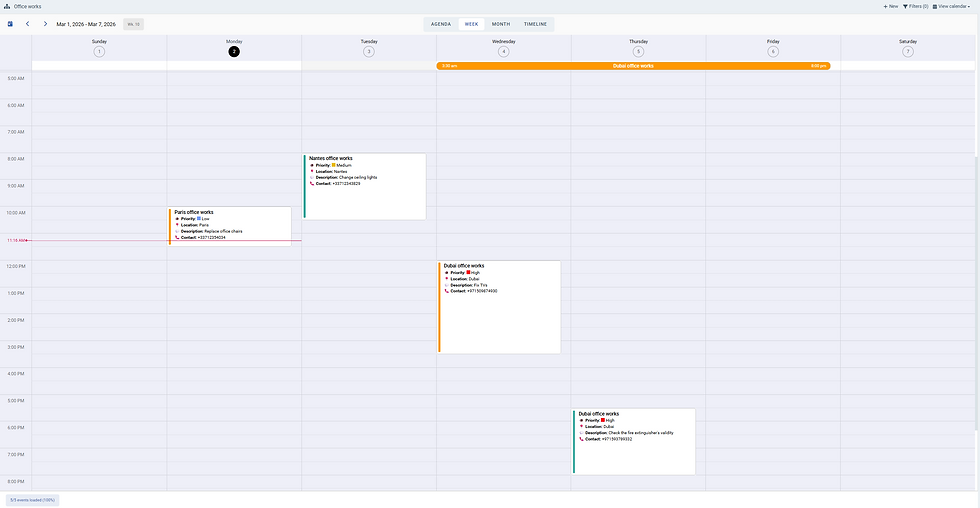
Week, a weekly representation of your records
Month, events scheduled for the desired month
Timeline, which serves as a scheduling tool for your teams.
On the left side of the toolbar:
The arrows allow you to navigate along the calendar.
The 'Calendar' icon allows you to quickly return to the current date.

Add a filter
As with all views, it is possible to apply a filter to improve readability or find the information you are looking for. A filter button next to the view selection allows you to open the side menu and access the filters panel.
This menu allows you to select the filter(s) to apply to your data. You will find a list of fields present in your form, with the option to configure the corresponding filter.
Once the configuration is done, you can filter your data by clicking the 'Apply' button.
An icon will appear next to the field name to indicate an active filter on that column. The field will also be displayed at the top of the menu, allowing you to quickly see the active filters and remove them if needed
Interactions
Please bear in mind that these interactions will run any automations you have configured on the form (if the triggers & conditions are met)
Create a submission
You can create events directly from your calendar view. There are two ways to do this: first, the classic method by using the plus button located at the top right.
It is also possible to create a new event by clicking directly on the desired date in the calendar, where the start and end dates will automatically be filled in the record.

Move a submission
You can drag & drop submissions to change their schedule. It will automatically update the start and end dates of your submissions.

When doing so, a dialog box opens towards the bottom of the screen in case you want to cancel your modifications. After 3 seconds, the submission is saved with your new dates.
Change the duration of submissions
It's also possible to edit the duration of a submission by resizing the submission's card
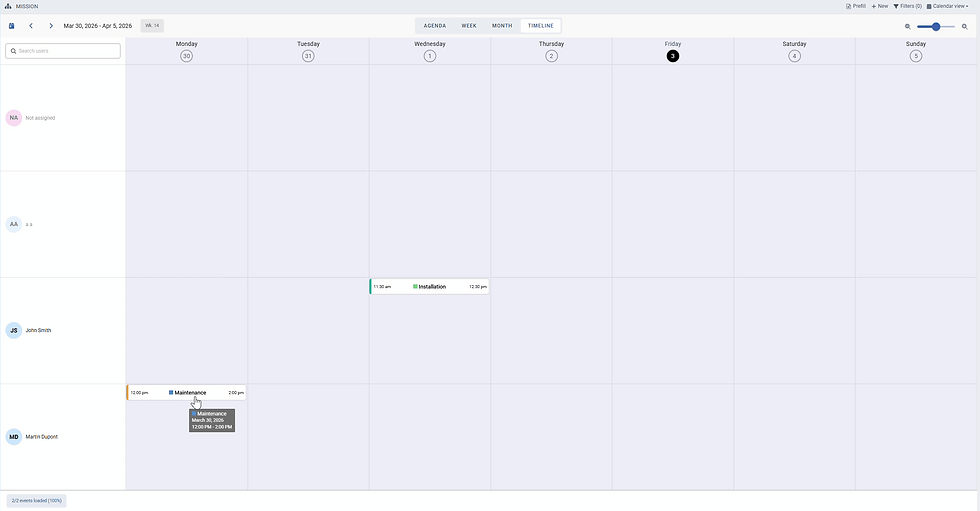
Timeline view
The timeline view allows you to organize your submissions by user assigned, and on a horizontal time axis. It's best used when needed to schedule the work of team members.
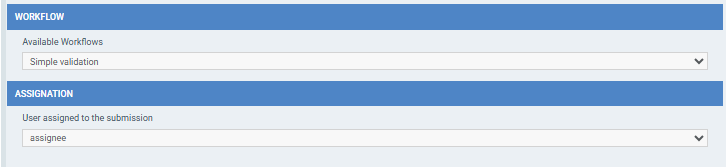
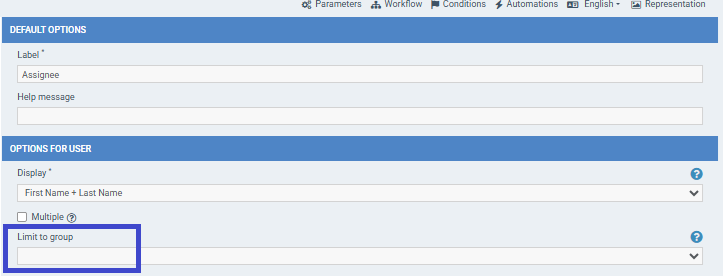
Pre-Requisite: Adding an assignee
The timeline view will be unavailable as long as you did not define a user field serving as assignee in your form. To do so, you need to have a user field in your form, and head to the "Workflow" menu of the form builder. You will be able to select any user field of your form to define the assignee of the submission. Once this is done, the view won't be greyed out anymore.
NB: If the field user field you select to act as assignee is restricted to a certain group (on the user field's option), only the users from that group will be displayed in the timeline view
Overview
The timeline view allows you to navigate between 3 distinct time granularities (Day, Week, Month) through the + and - icons on the top right of the screen. By default, the granularity is set to the weekly one.
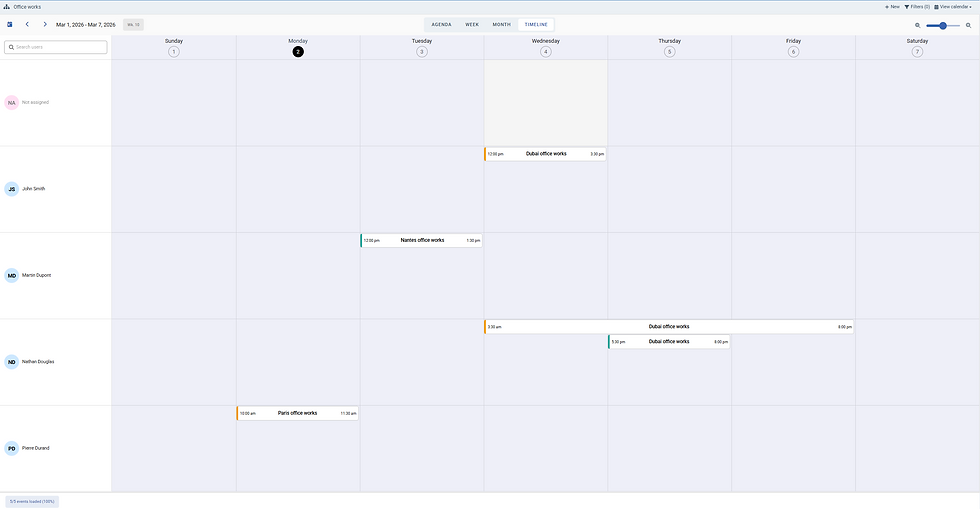
On the vertical axis, are displayed the active users of your workspace. A search bar is also there to allow you to search users efficiently. If a user's name is greyed out, it means that the user doesn't have any assigned submissions on the selected timeframe.
Submissions that are scheduled (having a start & end date and time) but don't have yet an assigned user will be displayed in the top row under "Not assigned".
NB: Currently, if a submission is not scheduled (no start & end date and time), you won't be able to visualize it in this view
Interactions
On top of supporting all the actions of the calendar view described in this document, the timeline view also has another possible interaction
Change the assignee of a submission
You can change the assignee of a submission by dragging and dropping a submission from one row to another.